Showing posts with label Forum sets. Show all posts

Key to my heart


Tube of choice i used Anna marine.
PTU.Tube and kit_Scrap Foxy_Anne Marine package_59.
You need a licence to use this art,you can purchase one HERE.
Plugins.
Eye Candy gradient glow.
dsb Flux Bright noise.
My wordart.HERE.
Font of choice i used Franklin Gothic Medium.

Banner...
File new 650x250.Fill with white.New layer.Select all.
Fill with paper9.paste into selection.Select none.
Resize tube of choice by85,paste as new layer far left side of template.
Sharpen,unsharpen mask.Drop shaddow,3.3.60.7.
Duplicate,image mirror.Resize by225.
Copy and paste my wordart as new layer top center of template.
Add url copyright and licence number.
Add name bottom center of template.
Add EC Gradient Glow,colour black halo on3.Then EC gradient glow thin white.
New layer on top of all layers.Select all.Fill with #ACD6E9'
Modify contract by5.hit delete.Add psp noise on 100 random.Drop shaddow.2.2.50.5.
Highlight background layer.Use selection tool,draw around top line,
add dsb Flux,bright noise on60 mix.Select none.
Edit copy merged,paste in animation shop as new animation.Back to psp.
Undo select none,undo noise,undo select none.
Draw around second line as above,Add noise on70.mix.Select none.
Edit copy merged,paste in animation shop after current frame.
Repeat this last section untill all lines have noise on.
Change amount on each line by adding10.
You should end up with 5 frames.
View animation save as.

Aviator...
File 150x150.fill with white.
Work as for the banner all layers.Resize by75 as you go.
Same border frame.Same noise but only on 3 layers this time,
Settings on 80.90.100.
Add copyright.!st.letter of name,center on right of aviator.
When all done to your liking,view animation,save as.
Hope you enjoyed doing my tut,thanks for trying it.


Shiny Girl


Tube of choice,i used Shiny Girl tube and kit.by Arthur Crowe.
You need a licence to use this art,you can purchase one HERE.
Montiblindmask.Thanks Monti for sharing.HERE.
Plugins.
Eye Candy gradient glow.
VM.Natural Sparkle.
Tube of choice i used Satisfaction.
Drop shaddow throughout.2.2.50.5.

Tag...
File new 650x650,fill with white.
Copy and paste paper07.as new layer,mask new from image,
select and apply mask,merge mask visable.Resize 110.
Resize Element14.by85.Paste as new layer on top center of mask.Magic wand,
Click in center of frame,modify exspand by5.
Copy and paste paper01.as new layer,invert hit delete,drag below frame.
Add VM Natural sparkle,just change max size to12.
Copy and paste element22.Paste as new layer,hit delete.Select none.Drop shaddow frame.
Resize full tube by50.Paste as new layer,on top bottom left of frame.
Sharpen then drop shaddow.
Resize element01.Paste as new layer bottom right of frame.Drop shaddow.
Resize element26.by35.Paste as new layer on top bottom left of tube.Drop shaddow.
Resize02 by35.Paste as new layer,image mirror.
Move to right of pearls.Drop shaddow.
Resize16 by35.Paste as new layer on top right of shoe.Drop shaddow.
Resize7.by20.Paste as new layer on top bottom left of purse.Drop shaddow.
Resize element18.by20.Paste as new layer on top right of shoe.Drop shaddow.
Resize element19.by20.Paste as new layer to right of lipstick.Drop shaddow.
Add url copyright and licence number.
Add name bottom right of tag,add EC gradient glow.
Delete white background,Save as PNG.

Banner...
File 650x300.Fill with white.
Copy and paste 01.Paste as new layer.Add VM.Natural Sparkle same as on your tag.
Copy and paste element22 as new layer,bottom center of template.Drop shaddow.
Copy and paste copy2 tube as new layer,move to left of template.Drop shaddow.
New layer on top of all layers.
Select all,float.Fill with black,modify contract by4.
Hit delete,add EC gradient glow on Black Halo size3.
Add url copyright and licence number.
Add name top right or template,add EC gradient glow thin white on3.
Delete white background,save as PNG.

Aviator...
File new 150x150,fill with white.
Copy and paste 01.Paste as new layer.Add VM.Natural Sparkle same as on your tag.
Copy and paste same tube from tag showing only head and shoulders.
Layers new on top of all layers.Fill with black.
Select all float,modify contrast by4.Hit delete.Add black halo gradient glow.
Add copyright and licence number.
Add 1st.letter of name top left of template.Add EC gradient glow.
Delete white background,save as PNG.
Hope you enjoyed doing my tut,thanks for trying it.

Noisy Star


Tube of choice i used Alex_Prihodko.
You need a licence to use this art,you can purchase one HERE.
Plugins.
Tramages tow the line.
dsb Flux bright noise.
Star borders.HERE.
Font of choice i used Riesling.
Banner...
File new 750x250.Fill with white.
Change foreground colour to white.Background to A3A3A3.
Make background a gradient, linear.Angle 45.3 repeats.
New layer,fill with above gradient.
Add Tramages Tow the line,default settings.
New layer on top of all layers,fill with black.
select all,Float,Modify contrast by4.Hit delete.
Copy and paste star border as new layer.
Highlight Black frame border,duplicate resize by90.
Use deformation tool adjust to fit around star border.
Resize full tube by25.paste as new layer,image mirror.
Place to left of template,sharpen,drop shaddow.2.2.50.5.
Paste tube again with just her face showing to right of template.
Drop shaddow,change blend mode to Luminance.Crop merged 0paque.
Add url copyright and licence number.
Add name place between tubes,rotate right,drop shaddow.
Highlight star border,Add dsb bright noise set on mix at 80.
Edit copy merged,paste in animation shop as new animation.
Back to psp,add noise mix set on 90.Copy merged,
paste in animation after current frame.
Back to psp,add noise mix set on 100.Edit copy merged,
paste in animation shop after current frame.
View animation,save as.
Aviator...
File new 150x150,fill with white.
Copy and paste each layer from banner to aviator resize as you go.
Work black border frames same as banner.
Copy and paste star border.Crop merged 0paque.
Add copyright and licence number.
Add 1st,letter of your name top left of template,drop shaddow.
Add noise layers as you did on banner.
View animation,save as.
Hope you enjoyed doing my tut,thanks for trying it. 

Diamonds are forever


Tube of choice i used Eugene Rzhevskii.
You need a licence to use this art,you can purchase one HERE.
Plugins.
Tramages Tow the line.
dsb flux bright noise.
Eye Candy gradient glow.
Tiny Star.HERE.
Font of choice i used MV Boli.
Banner...
File new 650x300.Fill with white.New layer fill with #C0C0C0.
Add Tramages Tow the line default settings.
Copy and paste close up tube far left of banner,Drop shaddow.2.2.50.5.
Have only her face showing.
Resize full tube by27,sharpen,drop shaddow.Change blend mode to Luminance.
New layer top of all layers,fill with black,select all.float,
Modify contrast by4.Hit delete on keyboard.select none.
Add dsb noise set on 100.Add EC gradient glow,white on 3.
Duplicate,resize by90,use deformation tool to mak equal all around banner.
New layer select all fill with #C0C0C0.Add noise same as above.
Add EC gradient glow black on3.Drag to below tubes,delete original layer.
Drag outer frame to top of banner.
Add url copyright and licence number.
Add name place between top of tubes.Rotate to left.Add noise,
Drop shaddow same as above.
Crop merged apaque.Merge all layers visable.Copy and paste twice,you need 3 banners in all.
Open tiny star in animation shop,File Export frames to picture tube.
Tube name Tiny star.Back to psp.
Click on picture tube,search for Tiny Star.
Add random stars on the earings in the 1st.banner,Edit copy,paste in animation as new animation.
Back to psps,reapeat as above adding stars on your 2nd.banner.
Copy,paste after current frame in animation shop.
Repeat agai for your 3rd.banner.
View animation,save as.
Aviator.
File new 150x150.
Copy and paste each layer as for the banner, Resize layers as you go to fit template.
Add frames same as on banner.
Add copyright and licence number.
\add 1st.letter of name top left corner of aviator.
Add tiny stars same way as on your banner.
View animation,save as.
Hope you enjoyed doing my tut,thanks for tryingb it.

Strawberry Delight


Tube 0f choice i used Alehandra_Vanhek.
You need a licence to use this art,you can purchase one HERE.
FTU Kittz Just black and white kit.Thanks for sharing.HERE.
Montiblindsmask.Thanks Monti for sharing.HERE.
Plugins.
dsb Flux Bright noise.
Eye Candy Gradient glow.
Font of choice i used Wolf in the City.
Tag...
File 650x650,fill with white,Copy and paste paper1 as new layer,
Mask new from image,select and apply mask,merge mask visable.
Resize bevel frame by875.
Paste as new layer.Magic wand click in center,
Modify exspand by5,new layer fill with black.
Resize Tube background by30.paste as new layer,invert,hit delete.
Select none,drop shaddow 2.2.50.5.
Resize tube b735,Paste as new layer bottom left of frame,sharpen,drop shaddow as above.
Resize butterfly by45,paste as new layer on top bottom center of frame flowers
sharpen then drop shaddow.2.2.50.5.
Resize beaded string by60.paste as new layer right side of frame,sharpen,drop shaddow as above.
Resize butterfly by45,paste as new layer on top flowers to the left.
Sharpen then drop shaddow as above.
Resize flower5 by45.Paste as new layer,top right of frame,sharpen,drop shaddow.
Resize b3 by45.Paste as new layer top right of frame,sharpen,drop shaddow as above.
Add url copyright and licence number.
Add name bottom right of tubes,add dsb Flux,bright noise,mix on 100.
Duplicate,select all float,drag below original.
modify exspand by1,fill with white.Add drop shaddow 2.2.50.5.
Delete white background,Save as PNG.
Banner...
File 650x300.Fill with black.Resize background by25,paste as new layer,
far left side of template,duplicate move to far right side of template.
Resize tube by75.Paste as new layer,on top center of both flowers.
New layer on top of all layers,Select all,Fill with #C26C58.
Modify contrast by5.Hit delete.add EC gradiant glow,thin white on3.
Resize butterfly by45,paste as new layer on top flowers to the left.
Add url copyright and licence number.
Add name bottom left of template,add dsb Flux,bright noise,mix on 100.
Duplicate,select all float,drag below original.
modify exspand by1,fill with white.Add drop shaddow 2.2.50.5.
Delete white background.Save as PNG.
Aviator...
File new 150x150,fill with black.
Resize tube background by50.Paste as new layer.Sharpen.
Place far right of template.
Resize tube by50,paste as new layer left of template.
New layer on top of all layers,fill with #8E403C.
Select all float modify contrast by5,hit delete .
Add copyright and licence number.
Add 1st.letter of name,top right corner of frame,add noise,Duplicate,
select all,float.modify exspand by1.fill with white,
drag below original name,drop shaddow.2.2.50.5.
Save as PNG.Delete white background,save as PNG.
Hope you enjoyed doing my tut,thanks for trying it.

Garv attitude


Tube of choice i used keith Garvey.
You need a licence to use this art,you can purchase one HERE.
Plugins.
MuRa's Meister coppies.
Eye candy gradient glow.
Font of choice i used Dungeon.
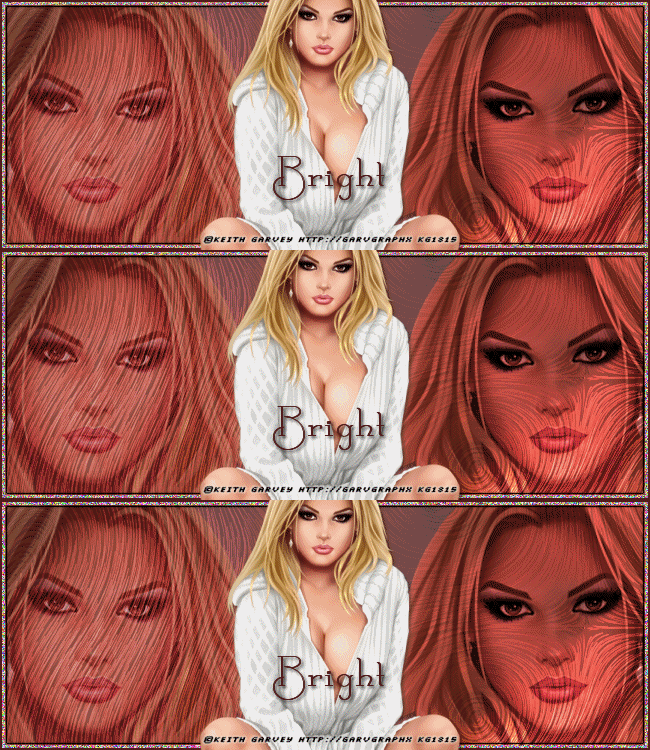
Banner...
File new 650x255.Fill with white.
Copy and paste main tube as new layer.
Effects MuRa's Meister copies.default wallpaper rotate.
Effects Mosaic antique,default settings.
Copy and paste main tube as new layer to right of template.
Drop shaddow.Duplicate move to right of frame,resize by90.
Showing from nose to bottom of bra.
Precepts tool,Rectangle size3.colour #952E32.Antialis and create as vector ticked.
Draw narrow rectangle across template.Add noise Random100.
Magic wand,click in center of rectangle.New layer fill with black.
Merge these two layers visable drag on top of left tube.under right tube.
Add Attitude wordart on top left of rectangle.add noise as above.
New layer on top of all layers,select all,fill with #952E32.
Modify contrast by4,hit delete,select none.Add noise as above.
New layer fill with black,select all,modify contrast b72,hit delete select none.
Add url copyright and licence number.
Add name place between the two tubes,Appl EC gradient glow colour Halo on3.
Add ec gradient glow this time on thin white on3.Save as PNG.
Aviator...
File new 150x150 fill with white.
Copy each layer from banner to aviator.Resize as you go by75.
Place 1st.letter of name on top center left of rectangle.
Save as PNG.
Hope you enjoyed doing my tut,thanks for trying it.

Black Sparkle


Tube of choice,i used Jennifer Janesko.
You need a licence to use this art,you can purchase one HERE.
Plugins.
dsb Flux bright noise.
Eye Candy gradient glow.
VM Natural Sparkle.
Font of choice i used Vivaldi
Banner...
File new 650x255.Fill with black.
Change foreground colour to #AE342F.Background to black.
Make background linear gradient,Angle45.10.repeats.
Precepts shapes,Rectangle,Antialias and Create as vector ticked.Line width2.
Close forground to nil,draw narrow rectangle across and towards top of template,
Add EC gradient glow,thin white size3.duplicate image flip.
Resize main tube by85.Paste as new layer on top left of template,
sharpen,then drop shaddow.
Copy and paste close up tube as new layer on top right of template,
image mirror drop shaddow.
New layer on top of all layers,fill with same gradient as above,
Select all modify contrast by2,hit delete,select none,
Add Bright noise set on mix size 100.
Duplicate resize by90.
Add url copyright and licence number.
Add name on top center of template.add EC gradient glow,thin white mix on3.
Highlight black background.
Effects VM Natural sparkle,default setting,just change max size to 13.
Edit copy merged,paste in animation shop as new animation.
back to psp.Undo sparkle,add sparkle again max 15.Edit copy merged,
paste in animation shop after current frame.Back to psp.
Undo sparkle,add sparkle max 18.Edit copy merged,
paste in animation shop after current frame.
View animation,save as.
Aviator...
File new 150x150 fill with black.
Copy and paste each layer from banner,paste on aviator as new layers.
Move tube over to the left of template.
Apply same both frame borders as on banner.
Add copyright and licence number.
Add 1st.letter of name on top center of triangles,add EC gradient glow.
Now add same borders as on banner.
View animation,save as.
Hope you enjoyed doing my tut,thanks for trying it.

It wasn't me


 Tube of choice,i used Misticheskaya.
You need a licence to use this art,you can purchase one HERE.
Wordart font.Vivaldi.
Name font.Satisfaction.
Plugins.
Penta.com Dot and cross.
Eye Candy gradient glow.
Banner...
Resize tube background by75.Paste as new layer,use deformation tool to stretch to fit.
Effects Penta.com, dot and cross.default settings.
Resize tube by30.Paste as new layer center of template,drop shaddow.2.2.50.5.
New layer on top of all layers,fill with #C44382.Select all,modify cotrast by4.
Hit delete on keyboard,select none.Add psp noise,uniform on 70.
Add It wsan't me wordart top right of template,add EC gradiant glow,thin white on1.
Add url copyright and licence number.
Add name to bottom left of templateadd psp noise as above,drop shaddow.2.2.50.5.
Save as PNG.
Aviator...
File new 150x150,copy and paste background from banner.Resize by75.
Paste as new layer,move to left so face is not showing.
Copy and paste tube from banner,resize by75.Paste to bottom right.
Apply border frame as on banner.Add copyright and licence number.
Add 1st.letter of name to top left,add noise.Select none.
Drop shaddow as as on banner,Save as PNG.
Hope you enjoyed doing my tut,thanks for trying it.


Snakey


Tube of choice.I used SnakeEyes Tube and Kit from Arthur Crowe.
You need a licence to use this art,you can purchase one HERE.
Montiblindsmask.Thanks Monti for sharing.HERE.
Eye Candy gradient glow plugin.
Font of choice i used Impact,all caps.
Drop shaddow throughout.2.2.50.5.unless stated otherwise.
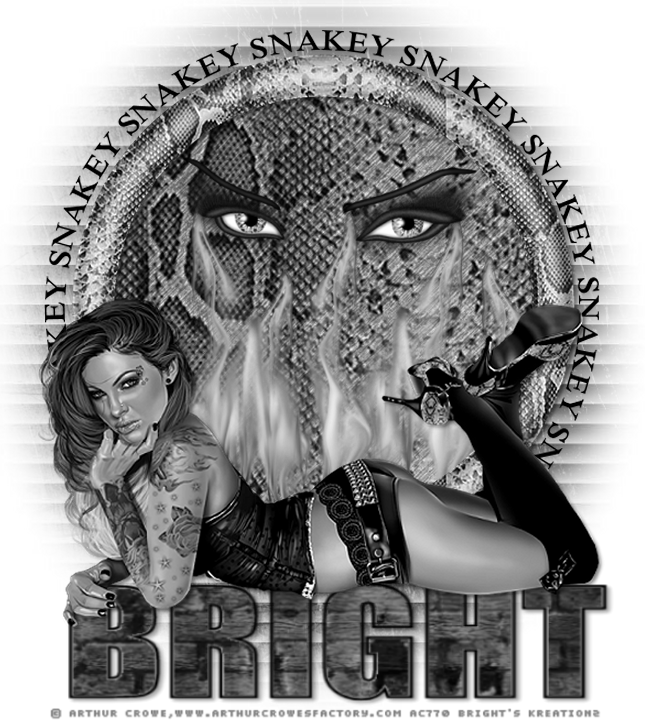
Tag...
File new 650x650,fill with white.New layer fill with paper8.
Mask new from image,select and apply mask,merge mask visable.
Copy and paste snake skin frame on top center of mask,
magic wand,click in center of frame,paste paper15 as new layer,
invert,hit delete.Drag below frame.
paste flames as new layer,hit delete.Select none.
Resize eyes by60.Paste as new layer on top center of frame.
Drop shaddow frame,eyes and flames.
Copy and paste my wordart as new layer outside of frame.
Resize tube by85,paste as new layer on top bottom of frame,drop shaddow.Gray scale tube.
Add name all caps,size72,you may have to play with it as names differ in size.
Use Black for the foreground and background nil.
With magic wand,click inside all letters,resize paper5 by45,
move over marching ants,invert,hit delete.Drop shaddow blank text layer.
Move name under tube layer,see mine for details.
Add url,copyright and licence number.Delete white background.Save as PNG.
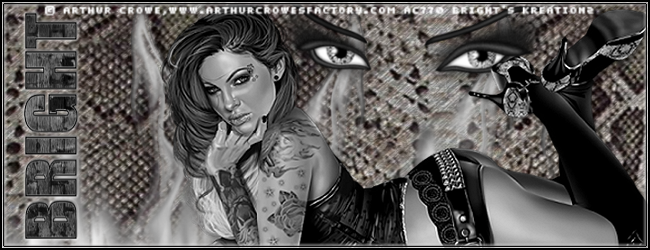
Banner...
file 560x250.Fill with white.
Paste paper8.as new layer.Paste flames as new layer to bottom of template.
Paste tube as new layer,place bottom center of template,drop shaddow.
Resize eyes paste as new layer,place top right of tube,drop shaddow.
New layer on top of all layers,fill with black,select all,
modify contrast by2,hit delete,select none.add EC gradient glow,colour black halo
change colour to white set on3.
Add url copyright and licence number.
Copy your name from your tag,paste as new layer onto your banner.
Resize and rotate to left 90% place down left side of banner.
Delete white background,save as PNG.
Aviator...
File new 150x150,fill with white.
Copy each layer from banner to aviator,resize layer as you go.
Place tube to left,and eye top right.1st.letter of name bottom right.
Work same frame as on banner.
add copyright and licence number.Save as PNG.
Hope you enjoyed doing my tut,thanks for trying it.



Cranberry


Tube opf choice,i used Keith Garvey.
You need a licence to use this art,you can purchase one HERE.
My Texture HERE.
Eye Candy gradient glow.
Font of choice i used Calamity Jane NF.
Banner...
File new 650x250.Select all,paste my texture2 into seletion.
resize layer3 tube by110.Paste as new layer far left of template.
Change blend mode to Soft light,duplicate,change blend mode to overlay.
Resize layer1 tube by75,paste as new layer,center of other 2 tubes.
Duplicate,effects,gussian blur set on5,change blend mode to Soft light,
drop shaddow on original 2.2.50.5.
New layer on top of all layers,fill with #521C1C.modify contrast by2,hit delete,
keep selected.Fill with #B19592.modify contrast by3.hit delete.Add EC black halo colour #521C1C size3.
Drag center tube to the top.
Add url copyright and licence number.
Add name place bottom center on top of tube,drop shaddow.2.2.50.5.duplicate.
Highlight frame border,Magic wand,click on the lighter frame,
add psp noise uniform set on 80.select none.edit copy merged,paste in animation shop as new animation.
Back to psp,undo select none & noise,add noise set on90.Select none,
Edit copy merged,paste in animation shop after current frame.
Back to psp.Undo select none & noise,add noise set on 100.Edit copy merged,
paste in animation shop after current frame.View animation,save as.
Aviator...
File new.150x150.
Copy and paste texture and tube layers from banner.
add border frame as on your banner.
Add copyright and licence number.
Copy and paste name from banner,place to bottom of template.
Now add noise layers as you did on your banner.
View animation,save as.
Hope you enjoyed doing my tut,thanks for trying it.


Hang On In


 Tube of choice,i used Gaetanodifalco.
You need a licence to use this art,you can purchase one HERE.
 PTU ScrapWDD IB-GaetanoDifalco-71 kit.HERE.
Font of choice,i used Before The Rain.
Eye Candy gradient glow plugin.
Banner...
File 650x250.Fill with white.Select all,paste paper1 into selection.
Copy and paste paper3.Select none.
Copy and paste raster1 tube as new layer,far left of template,resize by110.twice.
Change blend mode to Luminance.Drop shaddow 2.2.50.5.
Copy and paste tube from layer,Place far right of template leaning on other tube.Drop shaddow as above.
New layer above all layers,fill with gradient as follows.Foreground White.Background Black.Linear.Angle47.10.repeats.
Select all,modify contrast by4.hit delete.EC gradient glow,Colour.Black Halo,size3.
Add url copyright and licence number.
Add name place between the two tubes,Add EC gradient glow,black halo size1.
Save as PNG.
Aviator...
new 150x150.
Copy and paste both backgrounds and left tubelayers from banner onto aviator.
New layer above all layers,add border frame as on your banner.
Add copyright and licence number.
Add 1st.letter of your name,bottom right of template,add same EC as on banner,duplicate.
Save as PNG.Hope you enjoyed doing my tut, thanks for tryinFile g it.


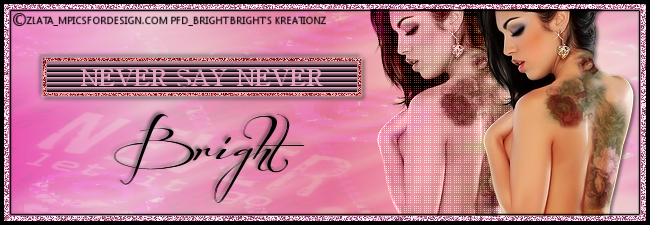
Never Say Never


Tube of choice,i used Zlatar_M.
You need a licence to use this art,you can purchase one HERE.
FTU 2 New Tezture Packs.Thanks for sharing.HERE.
Plugins.
dsb Flux.Bright noise.
Eye Candy gradient glow.
Font of choice,i used.Before the Rain.
Drop shaddow throughout,unless stated otherwise.
Banner...
File new 650x255.Fill with white.Selct all,fill with texture8 from pack7.into selection.select none.
Copy and paste full tube as new layer,to far right side,duplicate move to left of original.
Change blend mode to Luminance.Drop shaddow on original.2.2.50.5.
Change foreground colour to #C95C5E.Background nil.
Precepts tool.Antialis and Create as vector.Rectangle Width size3.
Draw a rectangle on the left of template,see mine for details.Convert to layer.
Add dsb noise set on 100.
Magic wand click inside rectangle.Fill with black.
Highlight !st rectangle,drop shaddow 2.2.50.5.then again -2.-2,50.5.
New layer on top of all layers.Select all,fill with black,
Modify,contrast by4.hit delete,keep,still on this layer,
fill with #E3A3C1.Modify contrast by5.Hit delete.Add noise again.
Add EC gradient glow.colour.Black Halo,size3.
Highlight black rectangle,add psp blinds,W.5.O.100.Colour #E3A3C1.Horizontal ticked.
Add wordart,Never say never,text in caps.Place on top center of blinds rectangle.
Drop shaddow 2.2.50.5.then again -2.-2.50.5.
Add url copyright and licence number.
Add name,place just below rectangles,drop shaddow.Save as PNG.
Aviator...
Copy and paste each layer from your banner,resize as you go.See mine for details.
Add same frames as on banner.Add copyright and licence number.
Add 1st.letter of name on top bottom right.Save as PNG.
Hope you enjoyed doing my tut,thanks for trying it.


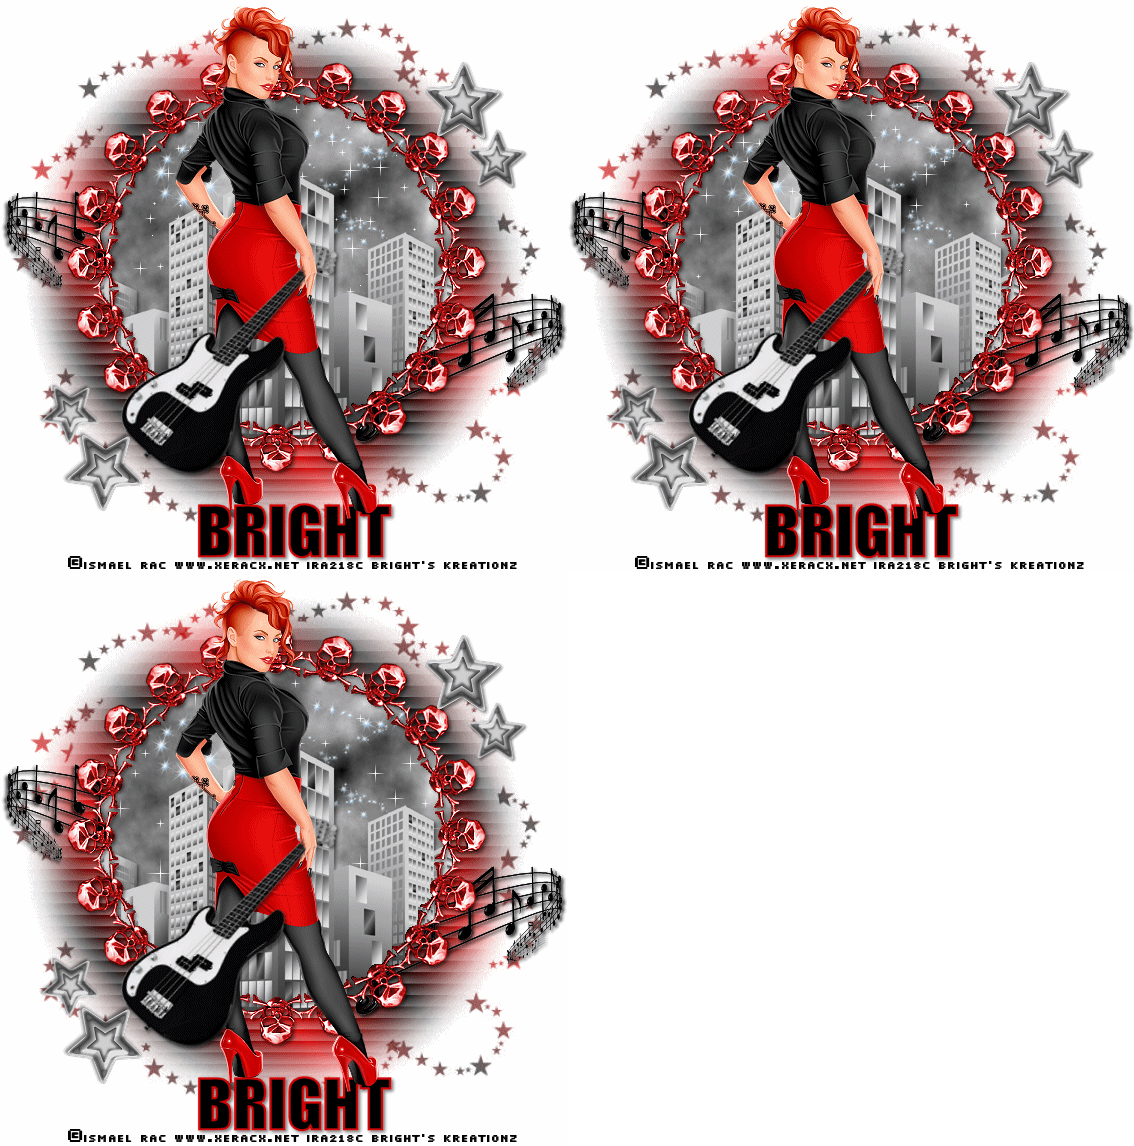
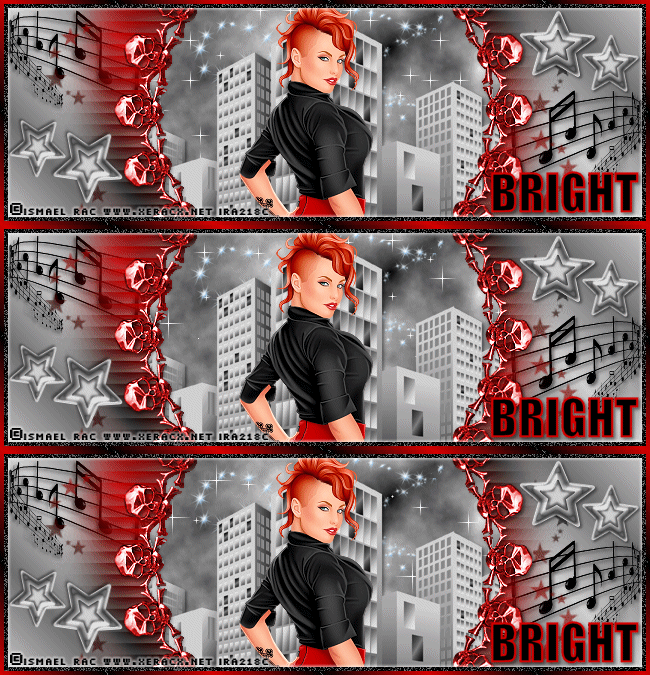
Punk Rocker


Tube of choice,i used Ismael Rac.
You need a licence to use this art,you can purchase one HERE.
FTU Blue Music kit,thanks for sharing.HERE.
Sensations mask,thanks for sharing.HERE.
Font of choice,i used Impact.
Plugins.
VM Natural Sparkle.
dsb Flux Bright noise.
Eye candy gradient glow.
Drop shaddow throughout.2.2.50.5.
 
Tag...
File new 650x650.Fill with white.New layer,fill with gradient.
Foreground red.Background black.Linear.Angle 57.7 repeats.Invert gradient unticked.
Mask new from image,select and apply mask,merge mask visable.
Resize element34.by75.Paste as new layer.Sharpen.
Magic wand,click in center,Colourize paper9.Hue 255.Saturation 207.
Resize by35.paste as new layer,Invert delete on keyboard.Drop shaddow.
Copy and paste element4,paste as new layer,delete on keyboard,
select none,drop shaddow.Highlight frame,magic wand click in center,
Effects.Murah's Meister coppies,cloud.Default settings.Light.FG white.BG black.
Resize element9,by45.Paste as new layer on top bottom right of frame,sharpen,drop shaddow.
Duplicate image mirror,move up a touch.Drag to bottom both layers.
Resize element26.by45.Paste as new layer on top bottom left of frame,
rotate slightly right,place on top of tube hand,erase small part to show
the hand is holding the guitar.Sharpen then drop shaddow.
Highlight frame,magic wand click in center,Paste element39.as new layer,
Invert delete on keyboard.Drag below the sky scraper layer.
Resize element13 by25.Colour grey scale.Paste as new layer top right of frame
sharpen then drop shaddow,Duplicate resize by75.move beneath 1st star to the right a bit.
Duplicate both these stars,then image mirror,then image flip.
Add url.copyright and licence number.
Add name i used all caps,size36,place under feet of tube,drop shaddow.
Delete white background.
 
Animation...
Highlight frame paper fill.Effects.Plugins.VM.Natural sparkle.
Max Size13.All others 255.Rnd Colour On/Off 255.Random Seed 142.
Edit copy merged,paste in animation shop as new animation.
Back to psp,undo sparkle,add sparkle max size 15.
Edit copy merged paste in animation shop after current frame.
Back to psp,undo sparkle,add sparkle max size 17.
Edit copy merged,paste in animation shop after current frame.
Select all,animation properties,set to 15.View animation,save as.

Banner...
File new 650x225.
Copy all layers from tag,paste one at a time on your banner.
Resize layers where needed.See mine for a guide and details.
Add borders...
New layer on top of all layers.Fill with red and black linear gradient
Angel 47.7 repeats.Select all float modify contrast by4.hit delete.
keep selected.Fill with black.modify contrast by4.hit delete.
Magic wand click on the black frame line,add dsb Flux bright noise on 100.
Add EC gradient glow,thin white on 3.
Add url,copyright and licence number.
Add name to bottom right of template i used text size 36.,drop shaddow.
Add Sparkle layers same as you did on your Tag.
Change properies to15.View animation,save as.
 
Aviator...
File new 150x150.
Work as for your tag but resize each layer as you go and sharpen.
Add copyright and licence number.
Add 1st.letter from name place to left center of frame,drop shaddow.
Repeat same sparkle as on tag.Change animation properties to15.
View animation save as.
Hope yopu enjoyed doing my tut,thanks for trying it.


Warm Purple


Tube of choice,i used Verymany.
You need a licence to use this art,you can purchase one HERE.
Masks 31 to35.I used 34.Thanks for sharing.HERE.
My star frames.HERE.
Font of choice i used Lombardic.
Eye Candy gradient Glow plugin.
Drop shaddow throughout.2.2.30.2.
 
Banner...
Open template mask 34.colourize Hue 205.saturation 109.
Resize tube by65.Paste as new layer center of template.Duplicate,
add Gussian blur on 5.
Change blend mode to Soft light,drop shaddow original tube.
Copy tube again far right of template,Duplicate image mirror.
Drag both these two tube layers under center tube layer.
Change blend mode on both end tubes Overlay.Then Opacity 70.
Create new layer on top of all layers.Fill with #480E5F.
Select all float modify contrast by4,delete on keyboard.
Fill with #EB74FD.Modify contrast by7.delete on keyboard.
Duplicate resize by 75.
magic wand,click on the pink frames,add psp noise,Uniform on 70.
Add EC Gradient glow,thin white on3 to both these layers.
Copy and paste my Stars side borders as new layers.Add psp noise as above.
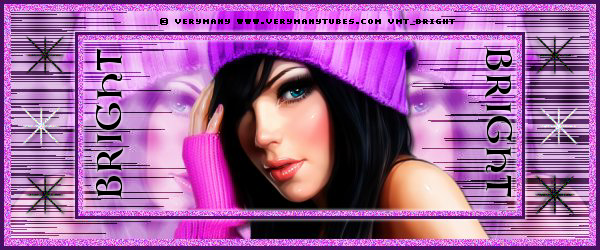
Add url copyright and licence number.Add name Tezt size 26.all caps,black.
Rotate 90 degrees right.Place down right of template.Duplicate.
Image rotate 90 degrees Left,the again.Place down left of template.
Add EC Gradient glow thin white on1.Save as PNG.
 
Aviator...
File new 150x150.
Copy and paste same mask as on banner,resize by60.Move to far left of template.
Add border frames same as on banner.
add my aviator stars.Paste tube,and work same as you did on banner.
Add copyright and licence number.
Add name as on banner,text size 18.Save as PNG.
Hope you enjoyed doing my tut,thanks for trying it.


Windy


Tube of choice,i used Alex Prihodko.
You need a licence to use this art,you can purchase one HERE.
Plugins.
Filters unlimited2.
Special effects2.Square bumps.
Penta.com.colour dot.
dsb Flux,bright noise.
Font of choice i used Impact.
Banner...
File new 650x250,fill with a linear gradient Angle58 repeats
Invert gradient ticked.Colours Foreground E39737.Background A83100
Make background your gradient.Effects Filters unlimited2.
Special effects2.Square bumps,default settings.Add Penta.com colour dot.
Change Background colour E39737.Fore ground0.Precepts shapes rectangle.
Antialias and create as vector ticked,Line width3.
Draw a rectangle between tubes from bust to bust.
Change colour to BFB3A1.Draw another rectangle.
fill with this colour,drag below 1st.rectangle,resize by110.
Add dsb bright noise set on 100.Drop shaddow 2.2.50.5.
Repeat drop shaddow but change the 2 to -2.
Resize tube without umbrella by45.Paste as new layer
left side of template,drag below rectangles.
drop shaddow as above.Duplicate image mirror.
Use freehand tool,point to point.
Draw around right handed fingers of tube,
paste as new layer on top of original,drop shaddow.
Repeat for the left hand of tube,see mine for details.
Copy and paste tube again,Do not resize it.place in between the two tubes,
Have only the head showing above the rectangle.
Drag below the other tubes.Change blend mode to soft.
Add a new layer above all other layers,and Flood Fill with 4F1605.
Click Selections.Select All.
Selections.Modify.Contract by2,hit Delete.
Keep selected,and now,Flood Fill with C0C0C0.contract by5
Fill with 4F1605.contract by2,hit Delete,then Select None.
Magic wand click on the center border,Add dsb Flux,bright noise on 100.
Add url copyright and licence number.
add name all caps on top center of rectangle,drop shaddow.
Highlight noise frame layer,add noise on80.Edit copy merged,
Paste in animation shop as new animation.Back to psp.
Add noise on90.Edit copy merged,paste in animation after current frame.
Repeat add noise one more time on100.View animation,save as.
Aviator...
File new 150x150,Copy and paste background from banner
paste as new layer on to aviator,resize by75.
Copy and paste left tube from banner to aviator sharpen.resize by75.
Add same frames as on your banner.
Add copyright and licence number.
Add 1st.letter of name top right corner of frame,drop shaddow. Save as PNG.
Hope you enjoyed doing my tut,thanks for trying it.


Too Hot


Tube of choice i used Arthur Crowe.
You need a licence to use this art,you can purchase one HERE.
FTU Skull Candies scrap kit.HERE.
DVB mask144 Thanks Vaybs for sharing both your kit and mask.HERE.
Font of choice i used Come With Me.
Drop shaddow throughout 2.2.50.5.
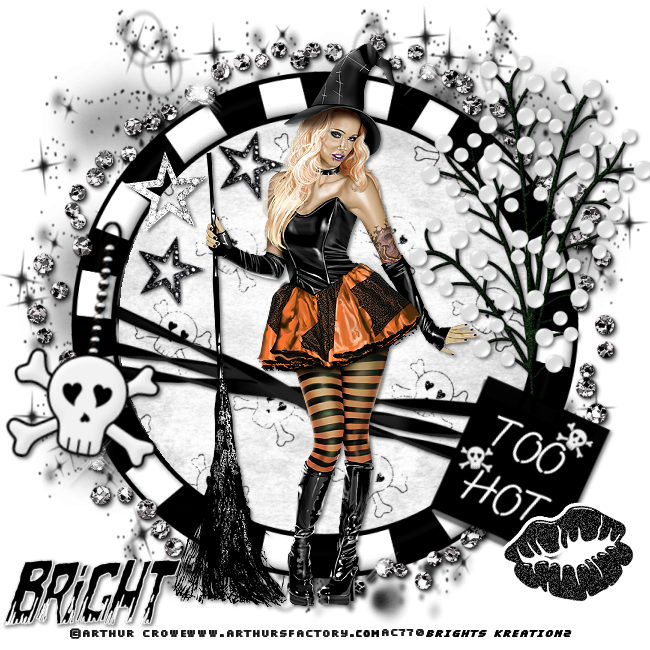
Tag...
File new 650x650 fill with white.,Paste paper14,as new layer.Mask
select and apply mask.merge mask visable.
Copy and paste element14.as new layer,on top center of mask.
Magig wand,click in center,modify exspand by5.
Resize paper9.by60,paste as new layer,invert delete on keyboard
select none,drag below frame.
Copy and paste element16,as new layer,drop shaddow.
Resize full tube by60.paste as new layer,drop shaddow.
Highlight frame,magic wand,click in center,modify exspand by3.
Resize element82 by75.paste as new layer,rotate slightly to right.
Invert delete on keyboars,select none,drag below frame,drop shaddow.
Resize element62 by75.Paste as new layer on top bottom right of frame.Drop shaddow.
Resize element57 by75,paste as new layer to right of frame,drag below element62,drop shaddow.
Resize element42.paste as new layer left of frame,drop shaddow,rotate slightly right.
Resize element26,image mirror paste as new layer bottomright corner element62.
Resize element79 by 30,paste as new layer top left of frame,sharpen,drop shaddow.
Resize element78 by 35,paste as new layer left of element79.Sharpen drop shaddow.
Duplicate image mirror,move to bottom element79.
Add url copyright and licence number.
Add name All caps to bottom left of frame,drop shaddow.
Delete background,save as PNG.
Hope you enjoyed doing my tut,thanks for trying it.
Banner...
File new 650x250 fill with white.Copy and paste paper9 as new layer.
Resize close up tube by75,Paste as new layer far left of template.
Drop shaddow 2.2.50.5.again -2.-2.50.5.
Copy and paste element82 as new layer,use deformation tool to stretch at sides.drop shaddow.
Resize elemement26,paste as new layer bottom right of template.
Resize element62 by75,paste as new layer to bottom right of template.Slightly rotate right.
Drop shaddow.Drag below element26.
Resize element57 by75,paste as new layer to right of template,drag below paper.drop shaddow.-2,-2,50,5.
resize element75.paste as new layer top left of template,drop shaddow.
Resize element78 by10.Paste as new layer right of element75,sharpen,drop shaddow.
Rersize element40 by 35,Paste as new layer top left of element62.Drop shaddow.
Change colours to white and black,make gradient from the black.
Highlight background,select all float,modify contrast by5,new layer fill with gradient,drag to top.
Linear.Angle.90.7.repeats.invert gradient ticked.select none.EC gradient glow,colour black Halo on size3.
Add url copyright and licence number.Add name Bottom right of tube,drop shaddow.Save as PNG.
Aviator...
File new 150x150 fill with white.Resize paper9.by45.paste as new layer.
Resize close up tube by50.paste as new layer to left of template,drop shaddow.
Copy the dark star from banner,paste as new layer top right of aviator template.
Make gradient frame same as on your banner.Change repeats to3.
Add copyright and licence number.
Add 1st.letter of name to bottom right of template,drop shaddow.Save as PNG.
Hope you enjoyed doing my tut,thanks for trying it.


Witchful Thinking


Tube of choice,i used barbara Jensen.
You need a licence to use this art,you can purchase one HERE.layered pack 46.1.
My wordart.HERE.
Plugins.
AAA frames. Foto Frames.
Eye candy Gradient Glow.
Exenofex.Constalation.
Font of choice,i used Witches Magic.

Banner...
File new 650x250.Fill with white.
Change colours to Lilac and black,make Linear gradient from the black.
Invert gradient ticked.Angle.60.7.Repeats.fill template with this gradient.
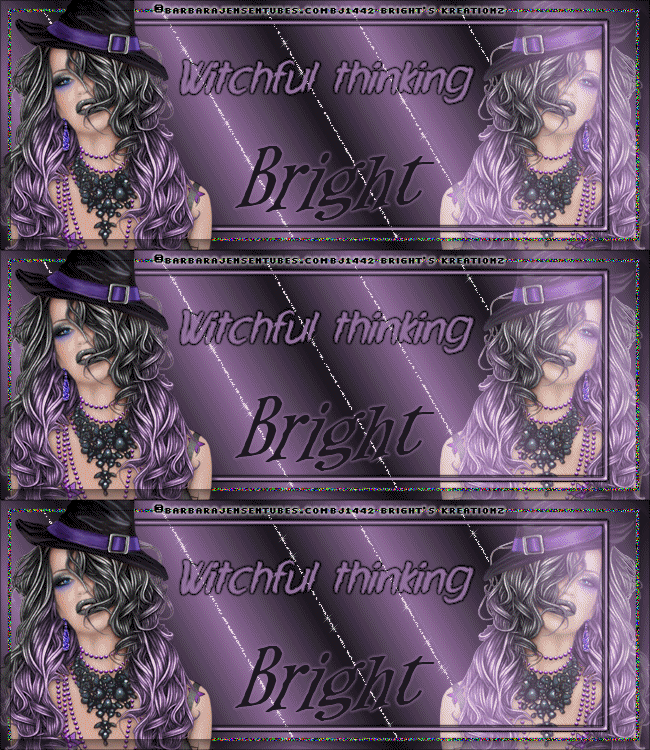
Copy tube of choice,paste head and shoulders to far left of template,
duplicate image mirror.Change duplicate tube to Screen,merge layers visable.

Effects AAA Frames,FOTO FRAME.Change Width to 10.Change Opacity to 49.
Magic wand click on line around template,add psp noise,Random 100.3 times.
Use Precepts tool,width3.Antialias and create as vector.Custom.
Draw a triangle inside template,light colour from your tube.see mine for details.
Add EC.Gradient glow.Black Halo set on3.Effects 3d.effects inner bevel.
Bevel2.Width10.S.25.D.7.A.-20.S.35.Angle.135.I.35.E.60.Colour White.
Erase bevel showing on top of left tube.
Add my wordart,to top between the tubes.Add EC as above.
Add url copyright and licence number.
Add name to bottom between tubes,Add EC as above but in a lighter colour.
Highlight your merged layer,magic wand,click on the dark and light lines on template.
Effects plugins.Exenofex.Constalation.Setting as followes.
From top to bottom.2.00.19.20.0.100.15.Twinkle rotation.45.keep original image.random seed.4507.
Edit copy merged,paste in animation shop as new animation.
Back to psp,undo to select none,undo constalation.
Add constalation hit random seed once.copy and paste as above in animation shop after current frame.
Repeat as above one more time.
View animation,save as.
Aviator...
File new 150x150.fill with white.
Copy and paste background from banner,resize by75.
Paste tube resize by75.place to bottom left of tempalte.
make a rectangle just inside frame.Add noise as on your banner.
Add copyright and licence number.
Add 1st.letter of your name,add EC as on your banner.Save as PNG.
Hope you enjoyed doing my tut,thanks for trying it.